Deploy to Heroku From a MacBook M1: Heroku CLI or GitHubActions


Setting up a new laptop is always fun, but this time with my new flashy MacBook Pro and the Apple-designed M1 chip is a different experience. The device is simply amazing and very performing, however, it has created headaches, especially for developers who need to run a variety of tools that are not yet compatible with ARM architecture.
This post is about how to deploy (*) on Heroku your projects developed on the Apple Silicon M1:
using Heroku Command Line Interface (with Rosetta)
creating a GitHubActions pipeline
(*) note that deploying with git (git push heroku master) works fine (Git Version Control has full native Apple Silicon support), but installing Heroku CLI is still necessary to create new applications, scale up and down, define Config Vars, etc..

Image by Lukas Gehrer from Pixabay
Heroku CLI with Rosetta
The Heroku CLI is not yet natively running on the Apple M1 chip, therefore the only option at the moment is to install and run it with Rosetta (Rosetta is the translation process that allows applications designed for Intel processors to run apps on Apple silicon).
New Terminal Application
Locate the Terminal application in ‘Finder->Applications->Utilities’ and (with right-click) duplicate the application (i.e. Terminal with Rosetta).
Open (with right-click) ‘Get Info’ and enable Rosetta.
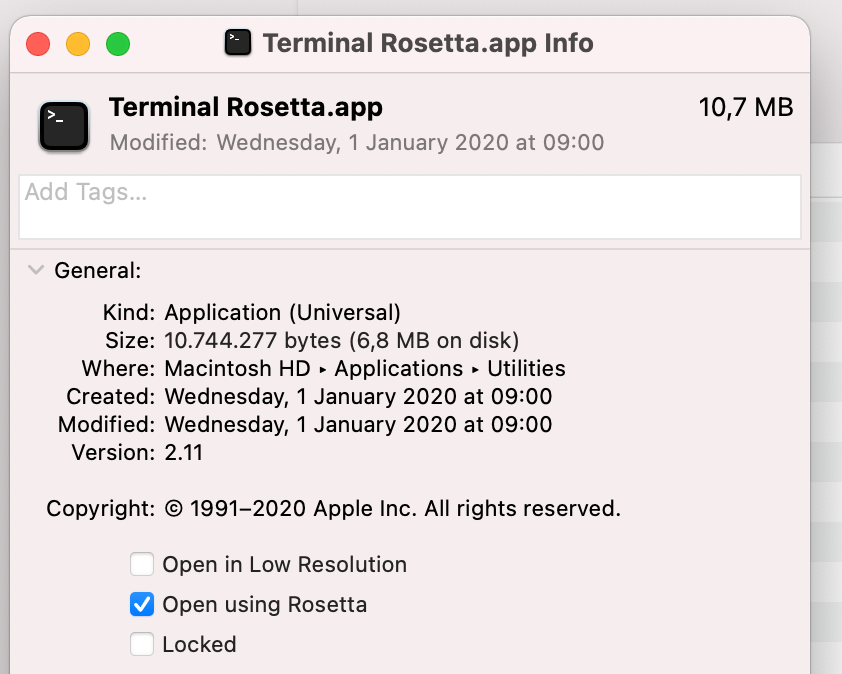
Open using Rosetta
You have now 2 Terminal apps which make it extremely convenient to switch between ARM and Intel modes. Over time applications will migrate to the new architecture and eventually the Rosetta mode will no longer be needed.
Install Rosetta
During the very first usage of the “Terminal with Rosetta” you will be prompted to install Rosetta: this is obviously the easiest way.
Rosetta can also be installed manually running
/usr/sbin/softwareupdate --install-rosetta
Install (again) brew
If you have installed Homebrew earlier (before enabling Rosetta) you have already downloaded M1-compatible packages on your Mac. Try:
% which brew
/opt/homebrew/bin/brew
to confirm it is the case and verify the default location (Homebrew for Apple Silicon is expected to be installed in /opt/homebrew ).
Make sure you open the “Terminal with Rosetta” and then install Homebrew again
/bin/bash -c "$(curl -fsSL https://raw.githubusercontent.com/Homebrew/install/HEAD/install.sh)"
==> Checking for `sudo` access (which may request your password).Password:
==> This script will install:
/usr/local/bin/brew
/usr/local/share/doc/homebrew
/usr/local/share/man/man1/brew.1
/usr/local/share/zsh/site-functions/_brew
/usr/local/etc/bash_completion.d/brew
/usr/local/Homebrew
....
The expected location of x64 Homebrew is instead/usr/local/bin.
There are now 2 Homebrews and this is perfectly fine: do not forget whichever brew is first found in PATH will run when you call brew. A smart idea is to create an alias for Rosetta Homebrew to simplify usage and avoid confusion
alias rbrew='/usr/local/bin/brew'
# Rosetta brew
% which rbrew
rbrew: aliased to /usr/local/bin/brew
# Native brew
% which brew
/opt/homebrew/bin/brew
Install Heroku
Heroku CLI can now be installed using Terminal with Rosetta
rbrew tap heroku/brew && rbrew install heroku
The Heroku Command Line should now be operational, verify and login
% heroku --version
% heroku login
% heroku apps
Docker Deployment with GitHub Actions
While the Heroku command line can be used to build and push Docker images into the Heroku Docker Registry it is a good idea to use a CI tool for doing this.
GitHub Actions is the GitHub CI/CD which allows GitHub users to compile, test, package, deploy, and a lot more… it is free, extendible (more actions and integrations popping up every day) and extensively documented with guides and examples.
Create a new Workflow
In your Git repository head straight to Actions and create a new “Workflow”
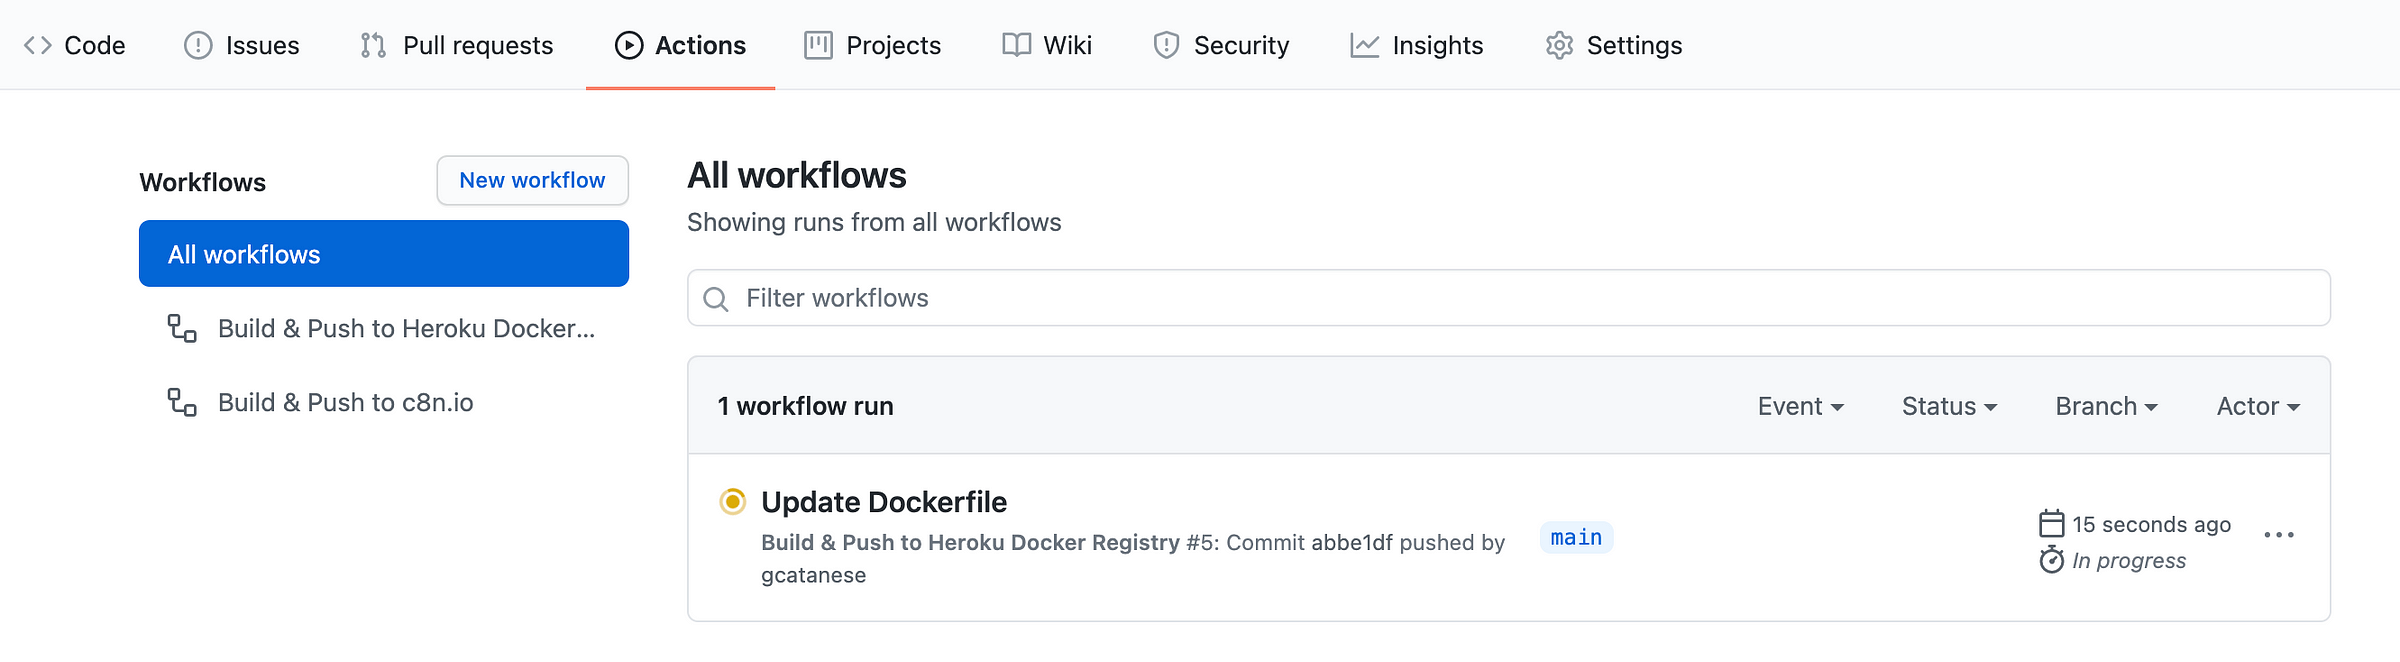
GitHub Actions workflows
The creation is simple and supported with a long list of templates, but ultimately it is possible to edit the action YAML file (which can be found in the .github/workflows folder).
The sample below is a Java application built with JDK11 and Maven, but the same concept applies to other programming languages and build tools.
name: Build & Push to Heroku Docker Registry
on:
  push:
    branches: [ main ]
jobs:
  build:
    runs-on: ubuntu-latest
    steps:
    # checkout source
    - name: Git Checkout
      uses: actions/checkout@v1
    # config JDK
    - name: Set up JDK 11
      uses: actions/setup-java@v1
      with:
        java-version: 11
    # Build the Jar
    - name: Build with Maven
      run: mvn -B package --file pom.xml
    # Login in Heroku
    - name: Heroku Container Registry login
      env:
        HEROKU_API_KEY: ${{ secrets.HEROKU_API_KEY }}
      run: heroku container:login
    # Build and push Docker image
    - name: Build and push
      env:
        HEROKU_API_KEY: ${{ secrets.HEROKU_API_KEY }}
      run: heroku container:push -a ${{ secrets.HEROKU_APP_NAME }} web
    # Release
    - name: Release
      env:
        HEROKU_API_KEY: ${{ secrets.HEROKU_API_KEY }}
      run: heroku container:release -a ${{ secrets.HEROKU_APP_NAME }} web
The pipeline is triggered by every git push on the main branch (this can customised and even done manually)
on:
  push:
    branches: [ main ]
The steps of the pipelines are:
preparing: checkout of the source code and configuration of the JDK
build: compile, build, test and package with Maven
deploy: authenticate Heroku token, build and push the Docker image
Secrets
The pipeline requires secrets (HEROKU_API_KEY (*) and HEROKU_APP_NAME) and those can be safely configured in the GitHub repository (go to Settings->Secrets->New repository secret) and never exposed in the source code.
(*) Grab theHEROKU_API_KEY from Heroku Dashboard in the Account “API Key” section
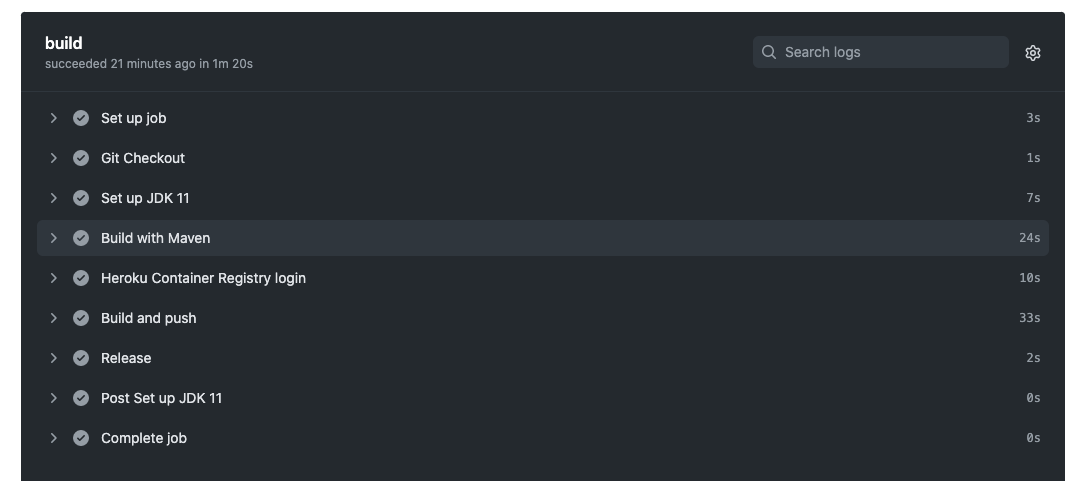
Workflow Summary
Conclusion
Working on the Apple M1 is a supreme experience, even if some tools still require the Rosetta layer. As time goes by more and more applications will migrate to the ARM architecture and eventually the entire development ecosystem will run natively. Until then some patching and tricks will allow us to survive!
Check out the GitHub repository SpringBootService.