1, 2, 3: Docker, Heroku, MongoDB Atlas, Python


1, 2, 3: Docker, Heroku, MongoDB Atlas, Python
This is a walkthrough explaining how to Dockerize and deploy on Heroku a Python application using MongoDB Atlas.
Why 1–2–3? Focus on simple essential aspects, clear code samples and relevant references.
The Application
It all starts with source code, of course, let’s create a Python app on top of the Flask framework.
The application provides a few REST endpoints and a DAO layer to access the database.
# app.py
from flask import Flask, request, Response
import logging
import requests, import os

try:
    app = Flask(__name__)

    logging.basicConfig(level=logging.DEBUG)
    logging.getLogger('werkzeug').setLevel(logging.ERROR)
except Exception as e:
    logging.exception("Error at startup")


@app.route('/ping')
def ping():
    """
    Ping the endpoint
    :return:
    """
    return "ping Ok"


def get_port():
    """
    Retrieves port for env variable
    :return:
    """
    return int(os.environ.get("PORT", 5000))


if __name__ == '__main__':
    app.run(debug=True, port=get_port(), host='0.0.0.0')
Verify you can run the application in your favourite IDE (PyCharm is mine) or from the command line (`python app.py`), it should respond to http://localhost:5000/ping
MongoDB Atlas
Sign up for MongoDB Atlas (if you do not have already an account) and set up your free MongoDB. It is straightforward following the Atlas step-by-step Wizard.
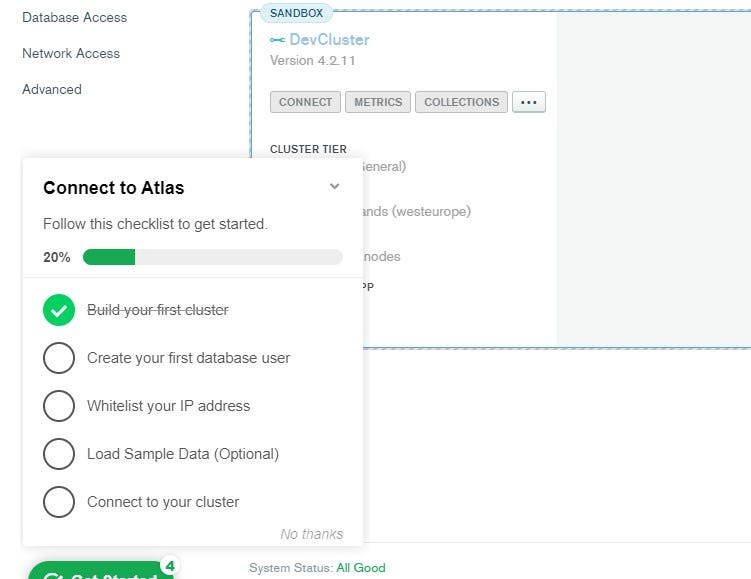
In a nutshell, you will need to:
create a cluster
create a DB user
allow incoming connections (edit firewall rules)
connect
A common mistake is to forget to allow your IP address (step #3 above): enter your current IP address or allow them all if your repository does not store critical data (for example for this tutorial).

The final and most interesting step is to connect to the MongoDB Atlas from your Python application
#db_client.py
from pymongo import MongoClient
connect_string = 'mongodb+srv://{db_username}:{db_password}@devcluster.s4lc7.mongodb.net/{db_name}?retryWrites=true&w=majority'
client = MongoClient(connect_string)
db = client.get_default_database()

# get user by name
def get_user_by_name(name):
    return db.user.find_one({"name": name})

# add new user
def add_user(name):

    ret = get_user_by_name(name)

    if ret is None:
        new_user = {"name": name}
        x = db.user.insert_one(new_user)
        ret = x.inserted_id

    return ret
The connect_string is hardcoded in the source code (don’t forget to replace the placeholders with the actual MongoDB username, password and DB name), this is done to simplify the example. You should really avoid that and instead, define the connection string (and any other configuration) as an environment variable.
Docker on Heroku
We have now a working application (you can add some unit testing too) and it is time to deploy.
The Heroku Docker Registry is a good solution to deploy your application for a few reasons:
you build a generic image that can be deployed on other Docker runtimes
Docker images are not subject to size restrictions unlike deployment from git repositories (max 500MB)
Pre-requisites
First, create a new Heroku application (using the Heroku CLI or the web interface) by choosing a good name ☺️
Secondly (and very importantly) log in to Heroku and in the Heroku Docker Registry
heroku login
heroku container:login
Dockerfile
Here is the Dockerfile for our example, starting from the python-slim base image.
FROM python:3.9-slim

COPY app/ /app

EXPOSE 5000

WORKDIR /app
RUN pip install -r requirements.txt

ENTRYPOINT ["python"]
CMD ["app.py"]
Build, Push, Release
Time to rock: let’s Dockerize the application and push it to Heroku. Note the image tag (registry.heroku.com) and the process type (web).
# build the image
docker build -t myapp .
# tag
docker tag myapp registry.heroku.com/myapp/web
# push
docker push registry.heroku.com/myapp/web
# release (when deployment starts)
heroku container:release web -a myapp
Check the logs to see it is really happening
heroku logs -a myapp
Invoke the /ping endpoint https://myapp.herokuapp.com/ping
TADAAAA!!! 😀
Config Vars
The last step is to remove the hardcoded database connection string (naughty developers!) and use instead an environment variable.
# read env variable
def get_mongo_connect_string():
    return os.environ.get("MONGO_CONNECT_STRING", "")
In your local development environment is a good idea to create a .env file which is typically gitignored (never pushed to your source repository) and uses the Python .dotenv package to load the values.
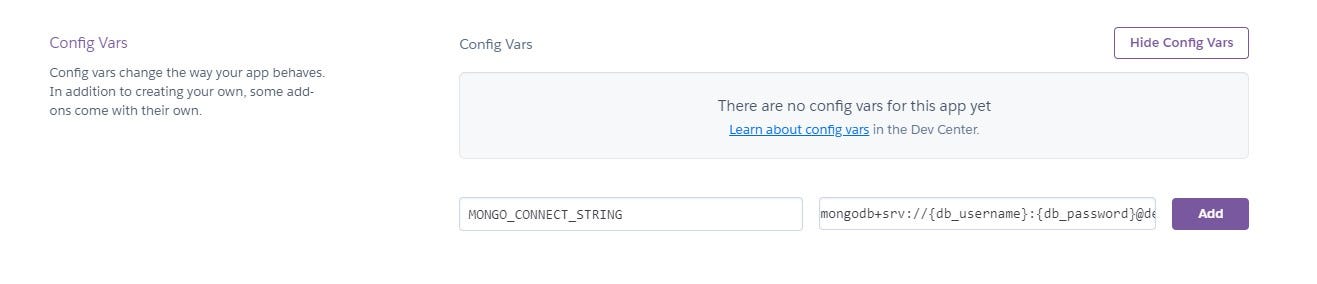
On Heroku, you want to define the environment variables as Config Vars: at deployment time Heroku will inject the variables (connection strings, tokens, secrets) in the Dyno provisioned for your application.
Conclusion
I hope this is helpful for developers who start to work with Docker and Heroku: the focus is mainly on providing clear code and configuration examples as they are the best way to learn.
References
Check out the walkthrough source code on GitHub
Docker Container Registry documentation on devcenter.heroku.com
Best practices for creating Dockerfiles on docker.com